
Page 48 - CC2017_AN_Look_Inside
P. 48
4. Click the Gap Size button at the bottom of the Tools panel and choose
Close Large Gaps.
The Gap Size menu allows Animate to overlook slight openings
between line segments, which is a common occurrence when
you draw with tools such as the Pencil or Line tool. Because you want all of these objects
to be solid fills, you are using the largest setting to allow the application to fill the areas
that you have defined. Note:
If you change the wrong
5. Click the end of the pointer in the tool cursor on the line that identifies the object (on a different
window shape to fill the shape with the defined fill color. layer), press Command/
Because the object doesn’t yet have a fill color, you have to click exactly on the existing Control-Z to undo the
line to fill the closed shape. If you clicked inside the shape, the tool would recognize the last step, and click again
fill color of the body shape and change its fill to black. to edit a specific object.
Paint Bucket Some users prefer to
tool Click exactly on the lock all but the layer
shape’s stroke to fill
it with the defined currently being edited, to
Paint Bucket fill color. prevent changes to objects
other than the one you
targeted.
Use this point to
determine what will
be filled with the Paint
Bucket tool.
6. Using the Selection tool, double-click the wheel group to enter into the group.
You have to enter into the group to edit the properties of individual group components.
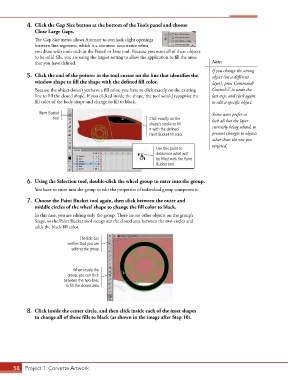
7. Choose the Paint Bucket tool again, then click between the outer and
middle circles of the wheel shape to change the fill color to black.
In this case, you are editing only the group. There are no other objects on the group’s
Stage, so the Paint Bucket tool recognizes the closed area between the two circles and
adds the black fill color.
The Edit bar
verifies that you are
editing the group.
When inside the
group, you can click
between the two lines
to fill the closed area.
8. Click inside the center circle, and then click inside each of the inset shapes
to change all of those fills to black (as shown in the image after Step 10).
58 Project 1: Corvette Artwork