
Page 46 - CC2017_AN_Look_Inside
P. 46
10. Show the Body and Sketch layers.
Note:
It’s always a good idea
to look for ways to avoid
duplicating work. You
will create the second
wheel by duplicating the
first wheel after you fill it
11. Save the file and continue to the next stage of the project.
with color.
Stage 3 Painting and Coloring Objects
You now have all of the primary shapes you need for this project, clearly organized on separate layers.
(You will create the front wheel later by duplicating the finished back wheel.) You drew all of these
shapes as unfilled objects so you could see the underlying sketch; now you can apply fill colors to the
various shapes. You can use a wide variety of methods to paint the car; you will explore these options
in this stage of the project.
Apply fill And stroke Colors to seleCted shApes
The most basic way to change an object’s color attributes is simply to select the object
and then define the appropriate colors — which you will do in this exercise.
1. With corvette.fla open, click the Body layer icon in the Timeline panel.
Remember, clicking a layer icon selects all objects on that layer.
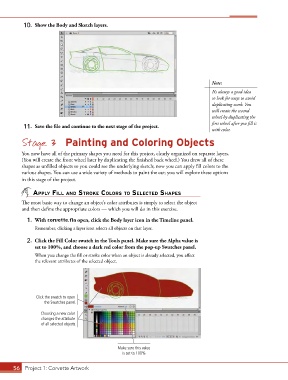
2. Click the Fill Color swatch in the Tools panel. Make sure the Alpha value is
set to 100%, and choose a dark red color from the pop-up Swatches panel.
When you change the fill or stroke color when an object is already selected, you affect
the relevant attributes of the selected object.
Click the swatch to open
the Swatches panel.
Choosing a new color
changes the attribute
of all selected objects.
Make sure this value
is set to 100%
56 Project 1: Corvette Artwork