
Page 15 - CC2017_AN_Look_Inside
P. 15
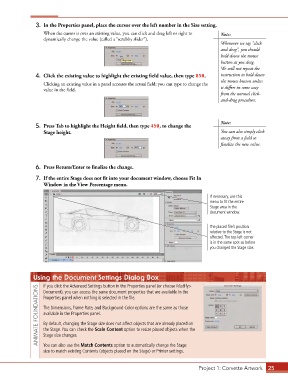
3.  In the Properties panel, place the cursor over the left number in the Size setting.
                   When the cursor is over an existing value, you can click and drag left or right to   Note:
                   dynamically change the value (called a “scrubby slider”).
                                                                                            Whenever we say “click
                                                                                            and drag”, you should
                                                                                            hold down the mouse
                                                                                            button as you drag.
                                                                                            We will not repeat the
                4.  Click the existing value to highlight the existing field value, then type 850.  instruction to hold down
                                                                                            the mouse button unless
                   Clicking an existing value in a panel accesses the actual field; you can type to change the
                   value in the field.                                                      it differs in some way
                                                                                            from the normal click-
                                                                                            and-drag procedure.


                                                                                            Note:
                5.  Press Tab to highlight the Height field, then type 450, to change the
                   Stage height.                                                            You can also simply click
                                                                                            away from a field to
                                                                                            finalize the new value.


                6.  Press Return/Enter to finalize the change.

                7.  If the entire Stage does not fit into your document window, choose Fit In
                   Window in the View Percentage menu.

                                                                                        If necessary, use this
                                                                                        menu to fit the entire
                                                                                        Stage area in the
                                                                                        document window.


                                                                                        The placed file’s position
                                                                                        relative to the Stage is not
                                                                                        affected. The top-left corner
                                                                                        is in the same spot as before
                                                                                        you changed the Stage size.


               Using the Document Settings Dialog Box

                   If you click the Advanced Settings button in the Properties panel (or choose Modify>
                 ANIMATE FOUNDATIONS  Properties panel when nothing is selected in the file.
                   Document), you can access the same document properties that are available in the

                   The Dimensions, Frame Rate, and Background Color options are the same as those
                   available in the Properties panel.

                   By default, changing the Stage size does not affect objects that are already placed on
                   the Stage. You can check the Scale Content option to resize placed objects when the
                   Stage size changes.
                   You can also use the Match Contents option to automatically change the Stage
                   size to match existing Contents (objects placed on the Stage) or Printer settings.


                                                                                   Project 1: Corvette Artwork  25